
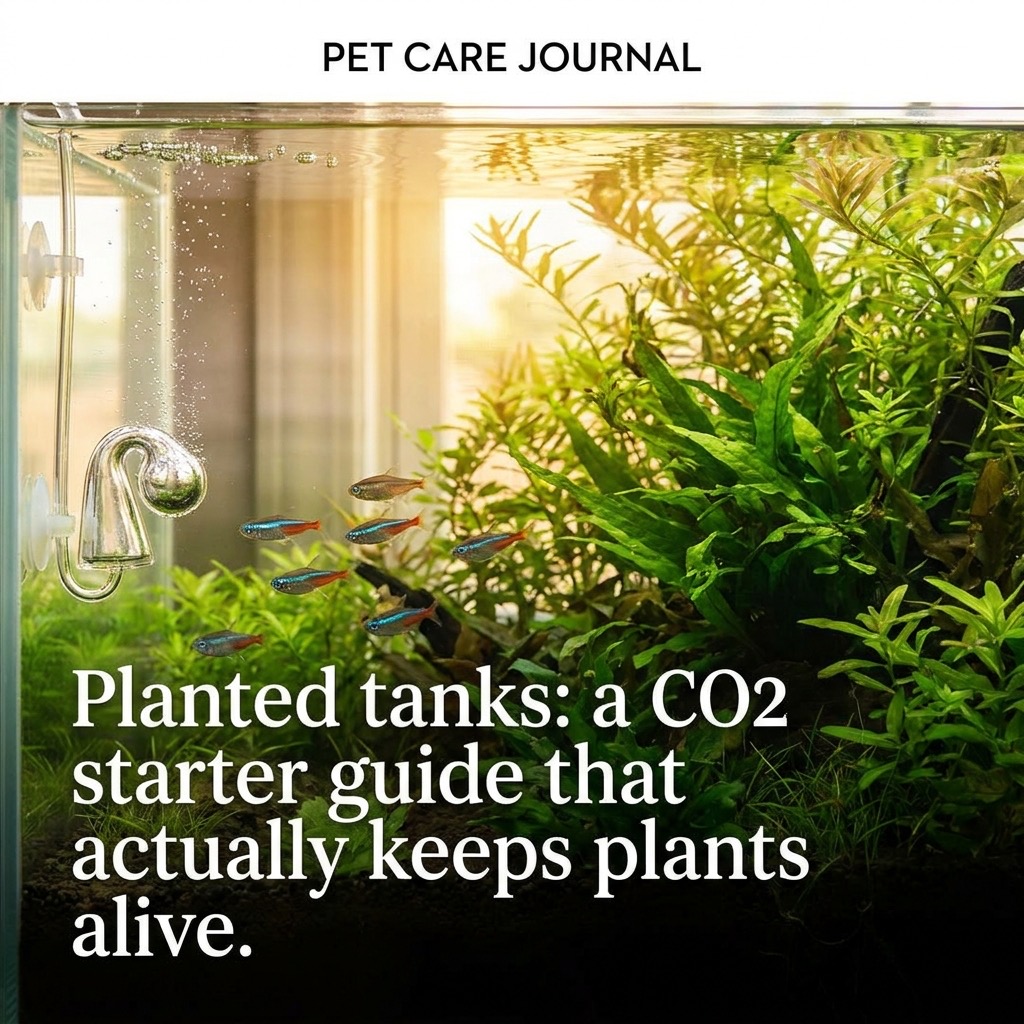
Planted tanks: a CO2 starter guide that actually keeps plants alive
Adding CO2 to a planted tank is the single biggest upgrade you can make for plant growth and visual quality. With CO2 injection, plants that were "slow-growing" become moderate-growing, plants that were "moderate-growing" become explosive, and plants that would never thrive in your low-tech setup suddenly carpet, bush out, and turn vivid colours.
It is also where most planted tank hobbyists either give up in frustration or burn through a lot of money on equipment they don't need. This is the guide I wish I had when I started high-tech planted tanks 20 years ago.
What CO2 actually does for plants
Photosynthesis requires three things: light, water, and CO2. In a low-tech planted tank (no injected CO2), the available CO2 comes from:
- Atmospheric exchange at the water surface (very slow, especially in still water)
- Fish respiration (small amounts)
- Bacterial activity (small amounts)
- Decomposition of organic matter (small amounts)
The total CO2 in a low-tech tank is typically 2–4 ppm. Plants can use this, but the rate is limited. Many plants will survive but not thrive. Carpeting plants (Monte Carlo, dwarf hairgrass, Hemianthus) typically fail without CO2.
Injected CO2 raises the dissolved CO2 level to 20–35 ppm. Plant growth rate approximately doubles at this level compared to atmospheric. Colour is more vivid. Carpeting plants become feasible. Stem plants grow faster and need more frequent trimming.
The biology is simple. The equipment and management are where it gets more involved.
The CO2 system components
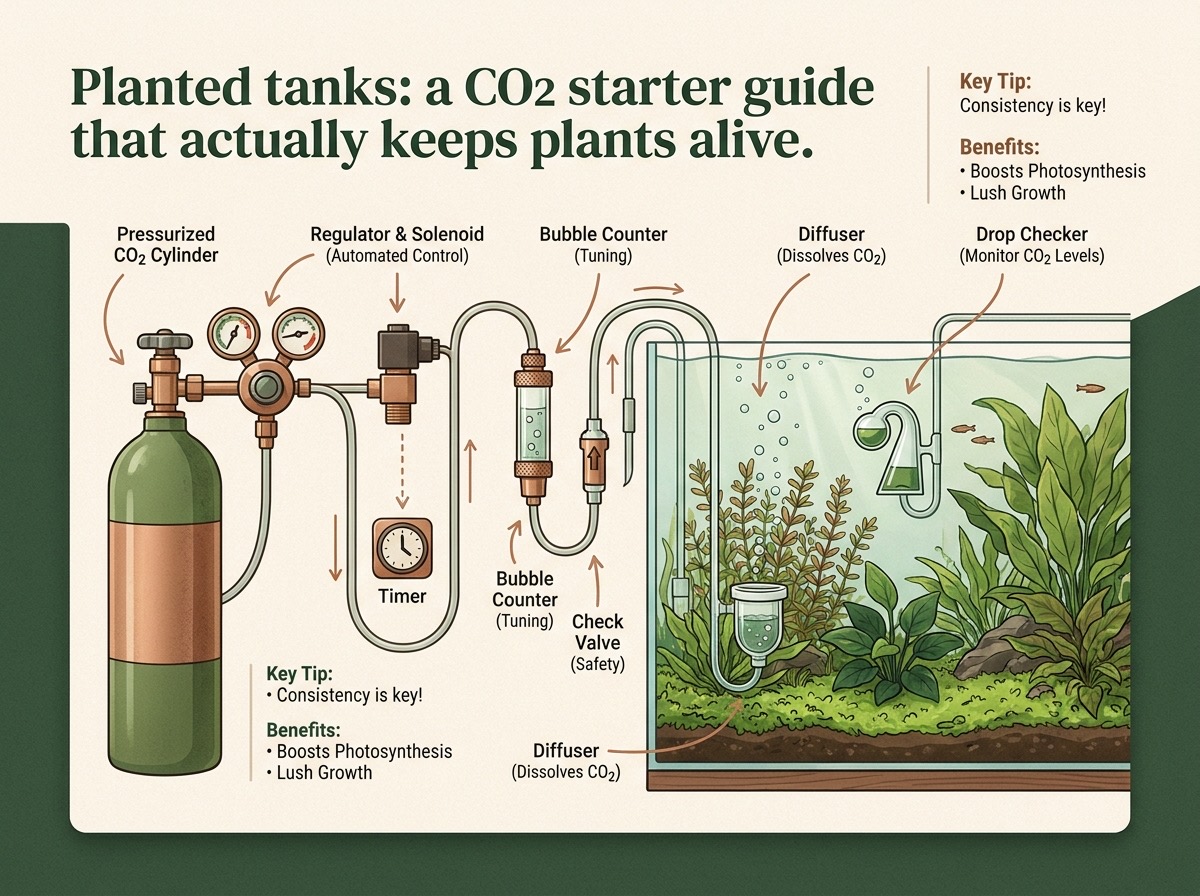
A complete CO2 system for a planted tank has five parts:
1. CO2 cylinder
The CO2 source. Two main options:
Disposable cylinders (paintball-style, 88 g): cheap entry option, lasts 1–3 months on a 100 L tank. No regulator needed (uses a simple "solenoid-less" disposable system). Downside: ongoing cost per cylinder, less consistent delivery.
Refillable aluminium cylinders (1.5–5 kg): standard for serious planted tanks. Lasts 6–18 months on a 100 L tank. Use a regulator. Higher upfront cost but lower per-month.
Refillable steel cylinders (5 kg): the commercial standard. Lasts 1–2 years on a 100 L tank. Cheapest per kg of CO2. Heavier.
Most home planted tanks use 2–5 kg aluminium or steel cylinders.
2. Regulator
Reduces cylinder pressure (high, ~800 psi when full) to working pressure (~30–60 psi). The regulator also has a solenoid (electric valve) that allows timer-based on/off control.
Brands I recommend:
- CO2 Art (Pro-Elite series): excellent value
- UP Aqua: solid mid-range
- GLA: high-end, very reliable
- AquaOxy: budget option, less precise
Look for: dual-gauge (cylinder pressure + working pressure), precision needle valve for bubble rate, integrated solenoid.
3. Bubble counter
A simple chamber that fills with CO2 bubbles and counts them as they pass. Used to set the bubble rate visually. Not strictly necessary but very helpful for setup and troubleshooting.
4. CO2 reactor or diffuser
The point where CO2 dissolves into the tank water. Two main types:
Inline diffusers (best for tanks with external filters): the CO2 is injected into the outflow of the filter and dissolved before the water returns to the tank. Highest dissolution efficiency.
In-tank diffusers (ceramic disc or CO2 ladder): sit inside the tank, usually under the outflow of the filter. Good for smaller tanks or those without external filtration.
Liquid CO2 (liquid carbon products): a liquid that releases CO2 when added to water. Useful as a low-tech alternative for low-CO2-demand plants. Not a substitute for true gas CO2 for high-tech tanks.
5. Drop checker (essential)
A small glass device filled with pH indicator solution (typically 4 dKH water + bromothymol blue) that hangs inside the tank. The colour of the solution indicates the CO2 concentration:
- Blue: too little CO2
- Green: optimal (25–35 ppm)
- Yellow: too much CO2 (dangerous to fish)
The drop checker is the simplest and most reliable way to monitor CO2 in real time.
Setting up the system
Step 1: install the cylinder and regulator
- Mount the cylinder upright in a stable location (use a strap or stand)
- Connect the regulator, solenoid, and bubble counter
- Connect the CO2 tubing to the diffuser or reactor
- Test for leaks by opening the cylinder valve and applying soapy water to all connections. Bubbles = leak
Step 2: position the diffuser
For in-tank diffusers:
- Place directly under the filter outflow for best dissolution
- The CO2 should rise as a fine mist of tiny bubbles, not large bubbles
- Position so the bubbles travel the longest distance before reaching the surface
For inline diffusers:
- Connect to the filter outflow pipe (after the filter, before returning to tank)
- The CO2 dissolves in the pipe before the water returns
Step 3: set the timer
CO2 should be on during the photoperiod only. Plants use CO2 when there is light; running CO2 at night wastes gas and can drop pH dangerously.
- Photoperiod on, CO2 on: 1 hour before lights on to 1 hour before lights off
- Total CO2 on time: 8–10 hours per day for most setups
Use a smart plug or outlet timer. Most aquarium controllers (Apex, Hydros, GHL) handle this automatically.
Step 4: set the bubble rate
Start with 1 bubble per second (BPS) per 100 L of tank water. Monitor the drop checker:
- After 1–2 hours of running, the drop checker should turn slightly green
- If still blue after 1 hour: increase bubble rate by 10–20%
- If yellow: decrease bubble rate immediately
Target: drop checker light green to lime green by mid-day. Slightly blue in the morning before CO2 fully equilibrates is OK.
Step 5: monitor and adjust
For the first 2 weeks:
- Check the drop checker 2–3 times per day
- Watch fish for signs of CO2 stress: gasping at the surface, lethargy, hiding
- Adjust bubble rate up by 10% if drop checker stays blue
- Adjust bubble rate down immediately if fish show any distress
After 2 weeks of stable operation, the system should require only weekly checks.
The CO2 drop checker — what the colour means
| Drop checker colour | CO2 level (ppm) | Action |
|---|---|---|
| Dark blue | <10 ppm | Increase bubble rate |
| Light blue | 10–20 ppm | Acceptable for low-light tanks; increase for high-light |
| Green | 20–35 ppm | Optimal for most high-tech setups |
| Yellow | >40 ppm | Reduce bubble rate immediately; risk to fish |
| Light yellow-green | 35–45 ppm | Borderline; reduce slightly |
The target colour depends on your tank's light intensity:
- Low light (20–40 PAR at substrate): light blue acceptable
- Medium light (40–80 PAR): light green
- High light (>80 PAR): green to lime green
More light requires more CO2 to balance. Without matching CO2 to light, you get algae (too much light, not enough CO2) or starved plants (too much CO2, not enough light).
Common problems and solutions
Problem: CO2 not dissolving (large bubbles reach the surface)
Causes:
- Diffuser ceramic disc is dirty or clogged
- Bubble rate is too high for the diffuser
- Diffuser is not positioned under the filter outflow
Solutions:
- Clean the diffuser in hydrogen peroxide for 30 minutes, then rinse
- Reduce bubble rate
- Move diffuser to a higher-flow location
Problem: fish gasping at the surface despite green drop checker
Causes:
- CO2 may be too high but the drop checker is slow to respond (it equilibrates over an hour)
- Other water quality issue (ammonia, nitrite, low oxygen from overstocking)
- Filter output disruption
Solutions:
- Reduce CO2 by 50% immediately
- Increase surface agitation temporarily (air stone on) to drive off CO2 and add oxygen
- Test ammonia, nitrite, pH
- If fish continue to gasp after 1 hour: emergency vet assessment
Problem: algae bloom after starting CO2
The most common beginner mistake is starting CO2 without sufficient light balance. CO2 plus high light plus high nutrients = algae.
The rules:
- Increase CO2 gradually over 2 weeks, not all at once
- Increase light gradually over 2 weeks after CO2 is stable
- Add nutrients (macros and micros) gradually after both CO2 and light are stable
If algae blooms:
- Reduce light duration to 6 hours/day temporarily
- Increase CO2 slightly (deeper green on drop checker)
- Add an algae crew: Amano shrimp, Nerite snails, Otocinclus catfish
- Manually remove visible algae
- Wait — most algae blooms resolve in 4–6 weeks with stable parameters
Problem: pH crashes
CO2 injection lowers pH. In tanks with low KH (carbonate hardness), the pH drop can be severe:
- KH <2 dKH: pH may swing from 7.5 to 6.5 between day and night — harmful to fish
- KH 3–4 dKH: pH swings are modest — generally safe
- KH >5 dKH: pH is well buffered — ideal
If pH crashes:
- Test KH
- If low, dose with potassium bicarbonate or similar to raise KH to 4–6 dKH
- The CO2 system is fine; the issue is the water's buffering capacity
Problem: CO2 cylinder runs out unexpectedly
Track consumption:
- 5 kg cylinder at 1 BPS in a 100 L tank lasts about 6 months
- Weigh the cylinder monthly to track consumption
- Keep a backup disposable cylinder for emergencies
- Some controllers (Apex, Hydros) can monitor solenoid runtime and alert you
What to plant after CO2 is stable
With stable CO2, lighting, and nutrients, you can grow plants that were impossible in low-tech setups:
- Carpeting plants: Monte Carlo, dwarf hairgrass, Hemianthus callitrichoides (HC), Glossostigma
- Red plants: Ludwigia super red, Rotala H'ra, Alternanthera reineckii (require especially high light and CO2)
- Stems: Rotala rotundifolia, Rotala wallichii, Bacopa caroliniana
- Mid-ground: Cryptocoryne species, Bucephalandra species (note: Buce is slow even with CO2)
- Background: Vallisneria, Sagittaria, larger Rotala species
Plants that still struggle even with CO2:
- True aquatic plants with high CO2 demand (some Rotala species need high light + high CO2)
- Plants that prefer water flow (Vallisneria, some stem plants do better with high flow than with CO2 alone)
The budget
A complete CO2 system for a 100 L tank:
| Component | Cost (USD) |
|---|---|
| 5 kg refillable steel cylinder (rented) | $20–40/year |
| Regulator with solenoid | $80–200 |
| Bubble counter | $20–40 |
| In-tank diffuser | $30–80 |
| Drop checker + 4 dKH solution | $20 |
| CO2 tubing | $10 |
| Total initial | $180–390 |
| Annual refill cost | $30–80 |
For a 200 L tank, scale the regulator and cylinder size up; the rest stays similar.
The investment pays back in:
- Plant growth (you'll need fewer plants)
- Reduced algae (more stable ecosystem)
- Lower fertiliser cost (plants use the nutrients rather than algae)
- Aesthetics (a high-tech planted tank is genuinely beautiful)
The bottom line
CO2 injection is the single highest-impact upgrade for a planted aquarium. It roughly doubles plant growth rate, enables carpeting and red plants, and reduces algae when balanced correctly. The system has five components (cylinder, regulator, bubble counter, diffuser/reactor, drop checker), runs on a timer matching the photoperiod, and is monitored by the drop checker colour. The most common beginner mistakes are starting too aggressively (causing fish stress or algae), ignoring KH (causing pH crashes), and over-lightning (causing algae). With 2 weeks of gradual ramp-up and consistent monitoring, the system runs itself. The plants do the rest.
---
About the author: [Kenji Tanaka](../Kenji%20Tanaka.md) is a ZNA-certified koi judge with 25 years of freshwater ornamental fish research, and has served on the judging panel of the All Japan Nishikigoi Show on multiple occasions.